Drawing Noisy Circles with p5.js: A Deep Dive into Polar Coordinates and Perlin Noise

In this creative coding tutorial, we’re building animated noisy circles using p5.js. These aren’t just ordinary circles—they pulse, shift, and morph over time. The motion comes from Perlin noise, and the structure is based on polar coordinates. You can tweak everything from color modes to noise intensity via a Tweakpane interface.
Whether you're just starting to learn to code or diving deeper into generative art, this sketch offers a hands-on way to explore math, motion, and design.
The Setup Function
Let’s break down the setup() function:
function setup() {
  createCanvas(window.innerWidth, window.innerHeight, WEBGL);
  pixelDensity(4);
  setupGui();
}
We use WEBGL to allow for more advanced transformations and better performance. pixelDensity(4) sharpens visuals, especially on high-resolution displays. Finally, setupGui() initializes our interactive controls using Tweakpane.
The Draw Function
Every frame, the canvas refreshes with a new frame of shifting curves:
function draw() {
  apply2DTransformations();
  noFill();
  strokeWeight(params.weight);

  colorGen = new ColorGenerator(params.baseColor);
  complementary = colorGen.getShades(2);
  background(complementary[1]);

  switch (params.colorMode) {
    case "tints":
      colors = colorGen.getTints(params.numberOfCurves, 90);
      break;
    case "shades":
      colors = colorGen.getShades(params.numberOfCurves, 10);
      break;
    case "triadic":
      colors = colorGen.getTriadic();
      break;
    case "tetradic":
      colors = colorGen.getTetradic();
      break;
  }

  createNoisyCircles(width / 2, height / 2, colors);
}
We:
- Set stroke weight and disable fill
- Generate a background color based on shades of the base color
- Pick a color palette based on the selected color mode
- Call
createNoisyCircles()to draw all the animated curves
To easily generate colors that work together, I used p5.colorGenerator, a library I created that can be found here:
Creating Noisy Circles
Here’s the core of the visual effect:
function createNoisyCircles(centerX, centerY, colors) {
  for (j = 0; j < params.numberOfCurves; j++) {
    beginShape();
    stroke(colors[j % colors.length]);
    curveNoiseFactor = params.noiseFactor + j;

    for (i = 0; i <= params.resolution; i++) {
      circlePoint = map(i, 0, params.resolution, 0, TWO_PI);
      curveRadius = j * params.gap;

      x = centerX + cos(circlePoint) * curveRadius;
      y = centerY + sin(circlePoint) * curveRadius;

      n = noise(
        x * params.noiseDetail,
        y * params.noiseDetail,
        frameCount * params.speed
      );

      let offsetX = n * cos(circlePoint) * curveNoiseFactor;
      let offsetY = n * sin(circlePoint) * curveNoiseFactor;

      vertex(x + offsetX, y + offsetY);
    }
    endShape();
  }
}
Shape Drawing: beginShape(), vertex(), endShape()
This trio of functions is how p5.js draws custom shapes.
beginShape()tells p5.js you're about to define a shape.vertex(x, y)places a point.endShape()finishes the shape and connects all the points.
In our case, each loop over i adds a new vertex to form a circle-like path. Because of the noise, it's not a perfect circle—it looks more organic, like ripples or ink on wet paper.
The Role of map()
circlePoint = map(i, 0, params.resolution, 0, TWO_PI);
The map() function remaps values from one range to another. Here, we’re taking a loop variable i from 0 to params.resolution, and translating that into angles from 0 to TWO_PI (which is 360° in radians).
This turns each value of i into a point along the circle’s circumference.
Polar Coordinates in Action
x = centerX + cos(circlePoint) * curveRadius;
y = centerY + sin(circlePoint) * curveRadius;
Using cosine and sine with the angle lets us calculate the x and y coordinates of a point on a circle. Multiply those by the radius, and you've got a full circle around the center.
I explained more about polar coordiantes in this article, if you want to learn more
Introducing Perlin Noise
n = noise(x * params.noiseDetail, y * params.noiseDetail, frameCount * params.speed);
Perlin noise gives us smooth randomness. By feeding it x, y, and time (frameCount * speed), we get a shifting value between 0 and 1 that changes slowly and predictably over time.
This noise value is used to create displacement:
let offsetX = n * cos(circlePoint) * curveNoiseFactor;
let offsetY = n * sin(circlePoint) * curveNoiseFactor;
We offset each vertex outward or inward based on the noise value, creating the effect of a circle that breathes or morphs as time passes.
Looping Over Multiple Curves
We draw multiple noisy circles by repeating the process params.numberOfCurves times. Each circle gets its own radius and slightly different noise factor, which increases outward:
curveNoiseFactor = params.noiseFactor + j;
The result is a series of layered, animated, organic shapes that shimmer and move independently.
Interactive Controls with Tweakpane
Users can tweak noise strength, resolution, curve count, spacing, color modes, and stroke thickness:
pane.addInput(params, "noiseDetail", { min: 0, max: 0.3, step: 0.001 });
pane.addInput(params, "numberOfCurves", { min: 1, max: 150, step: 1 });
pane.addInput(params, "colorMode", {
  options: { Tints: "tints", Shades: "shades", Triadic: "triadic", Tetradic: "tetradic" },
});
This makes the sketch not just a generative system but a playground for experimentation.
Final Thoughts
This sketch is a fun way to explore how math and noise can work together to produce flowing, organic animations.
Generative art is all about systems and surprises—and here, both come to life through circles that are never quite the same.
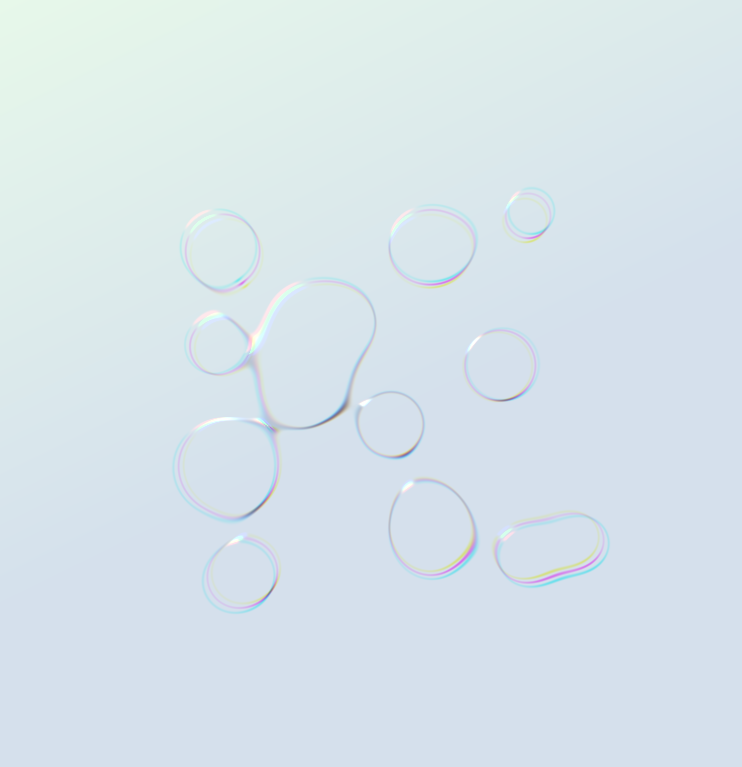
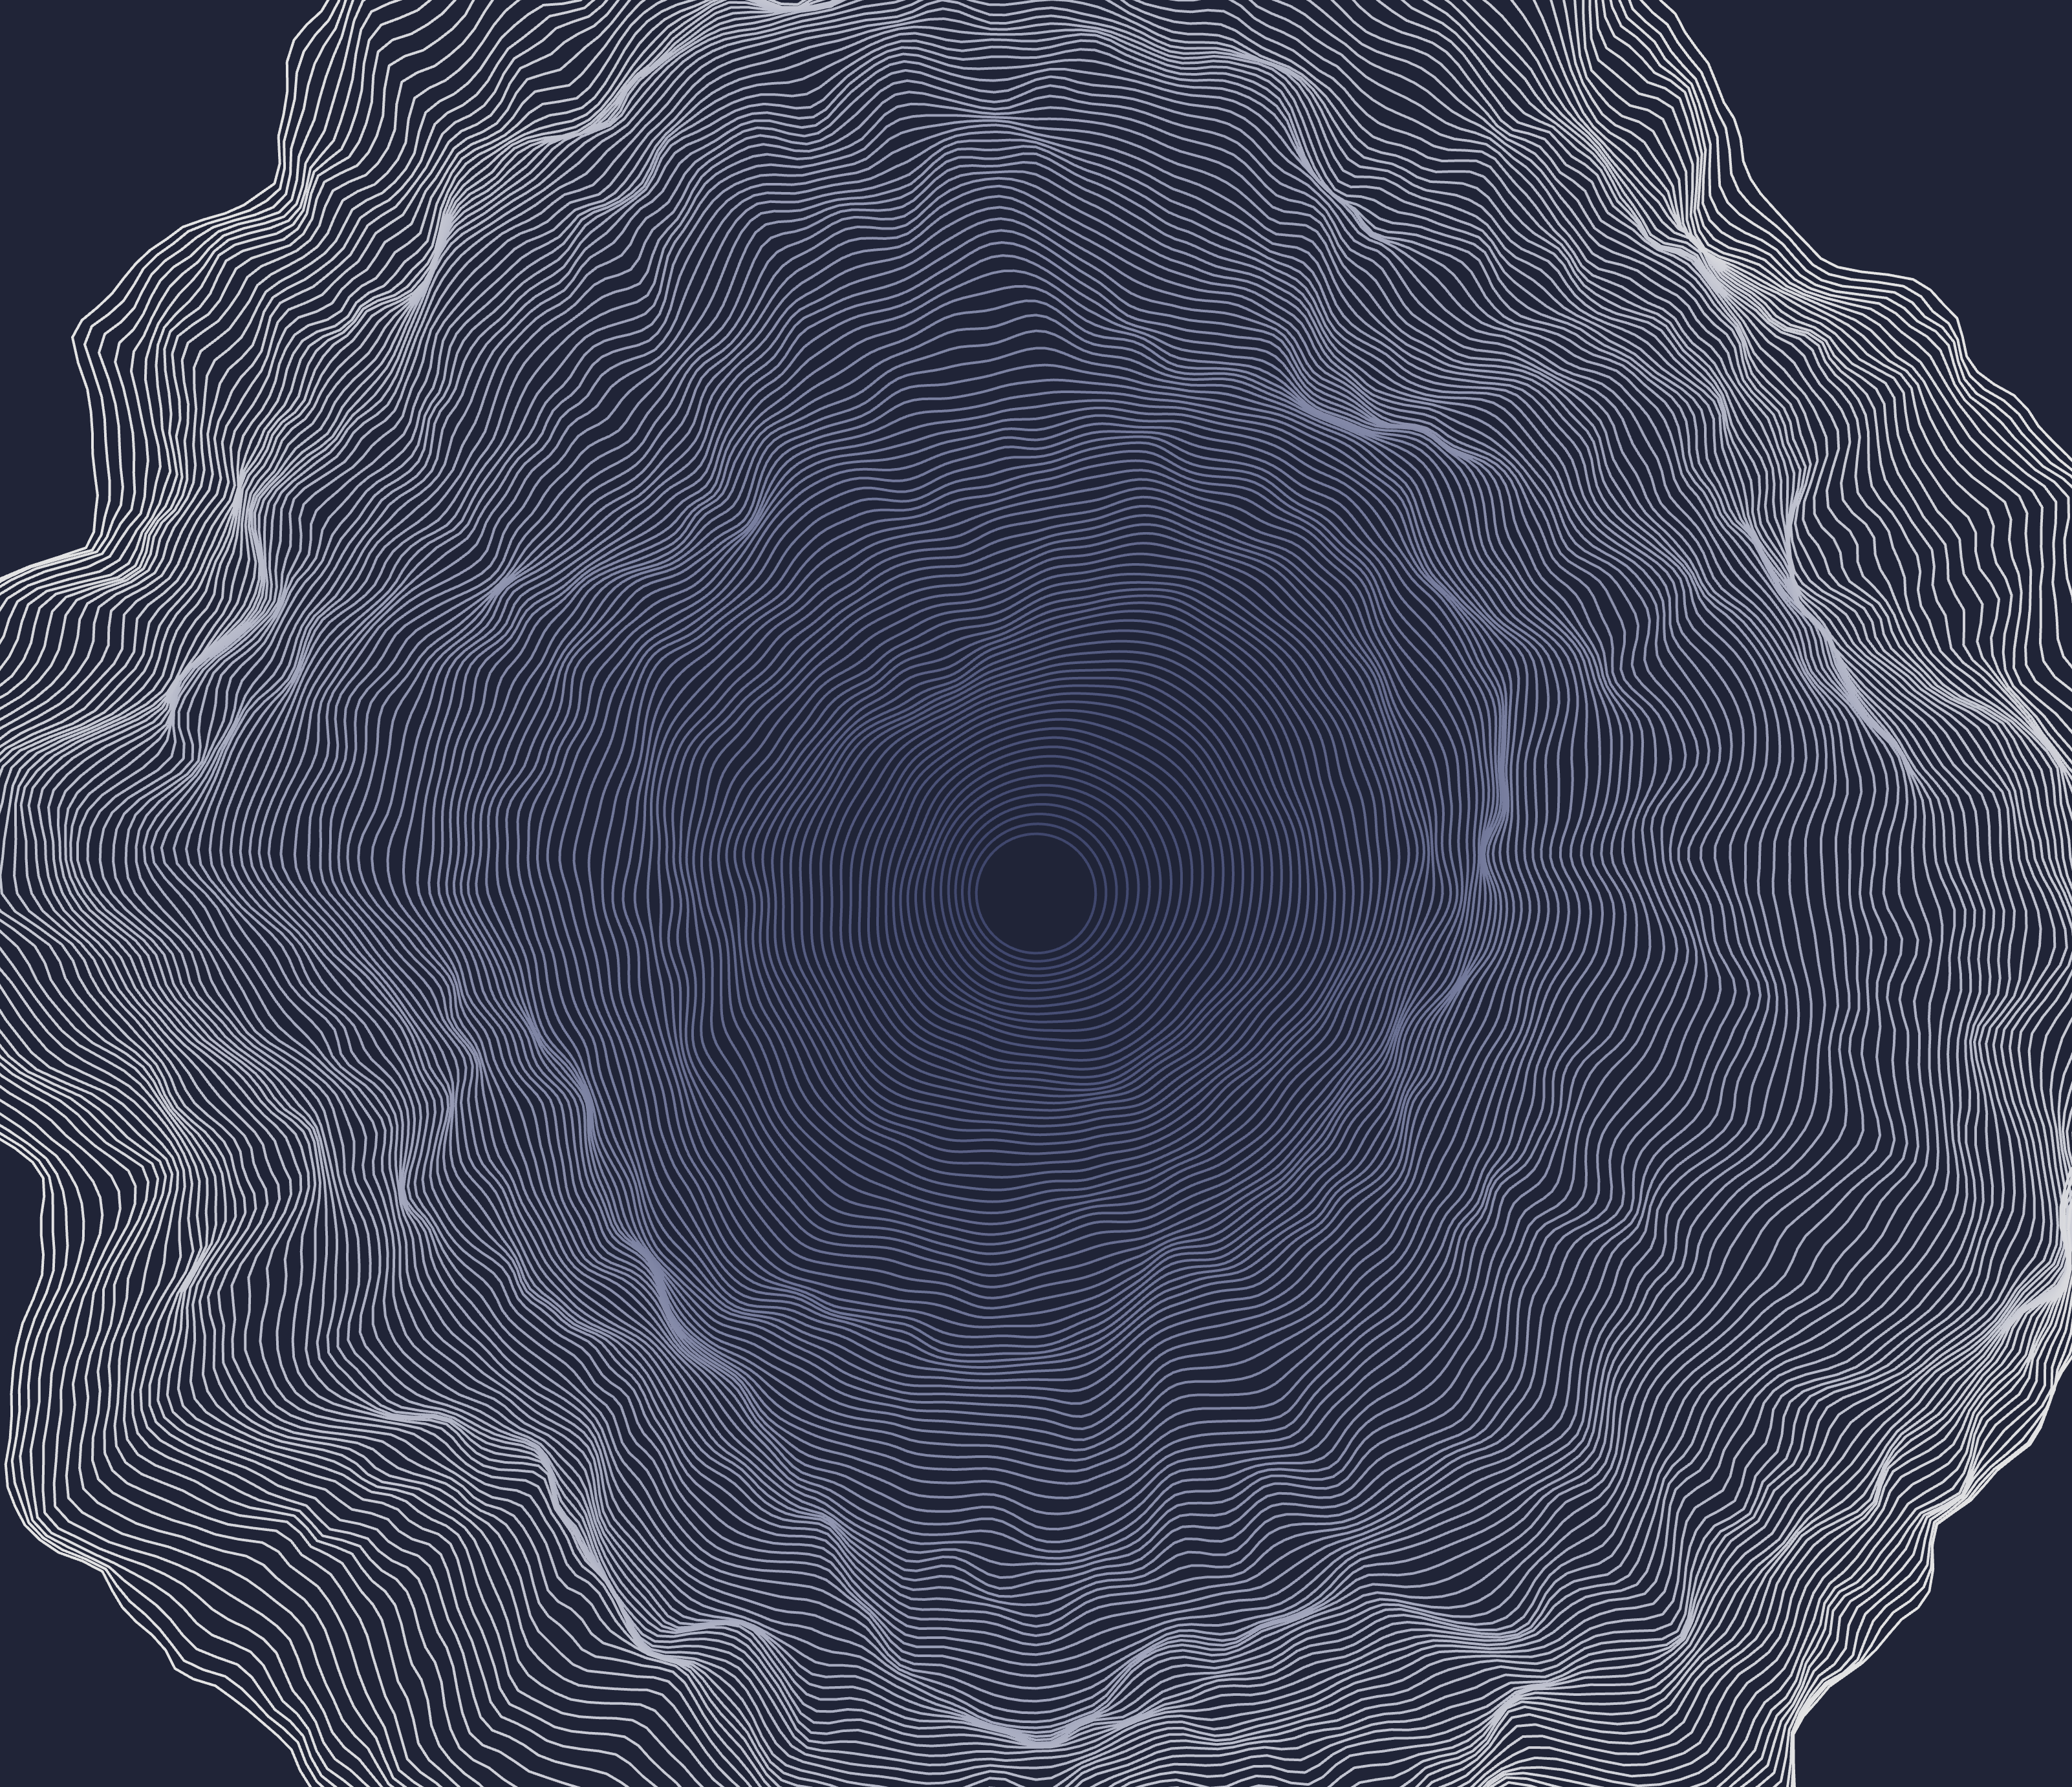
I encourage you to play around with the sliders and see what you can come up with. Here are a few of my results:
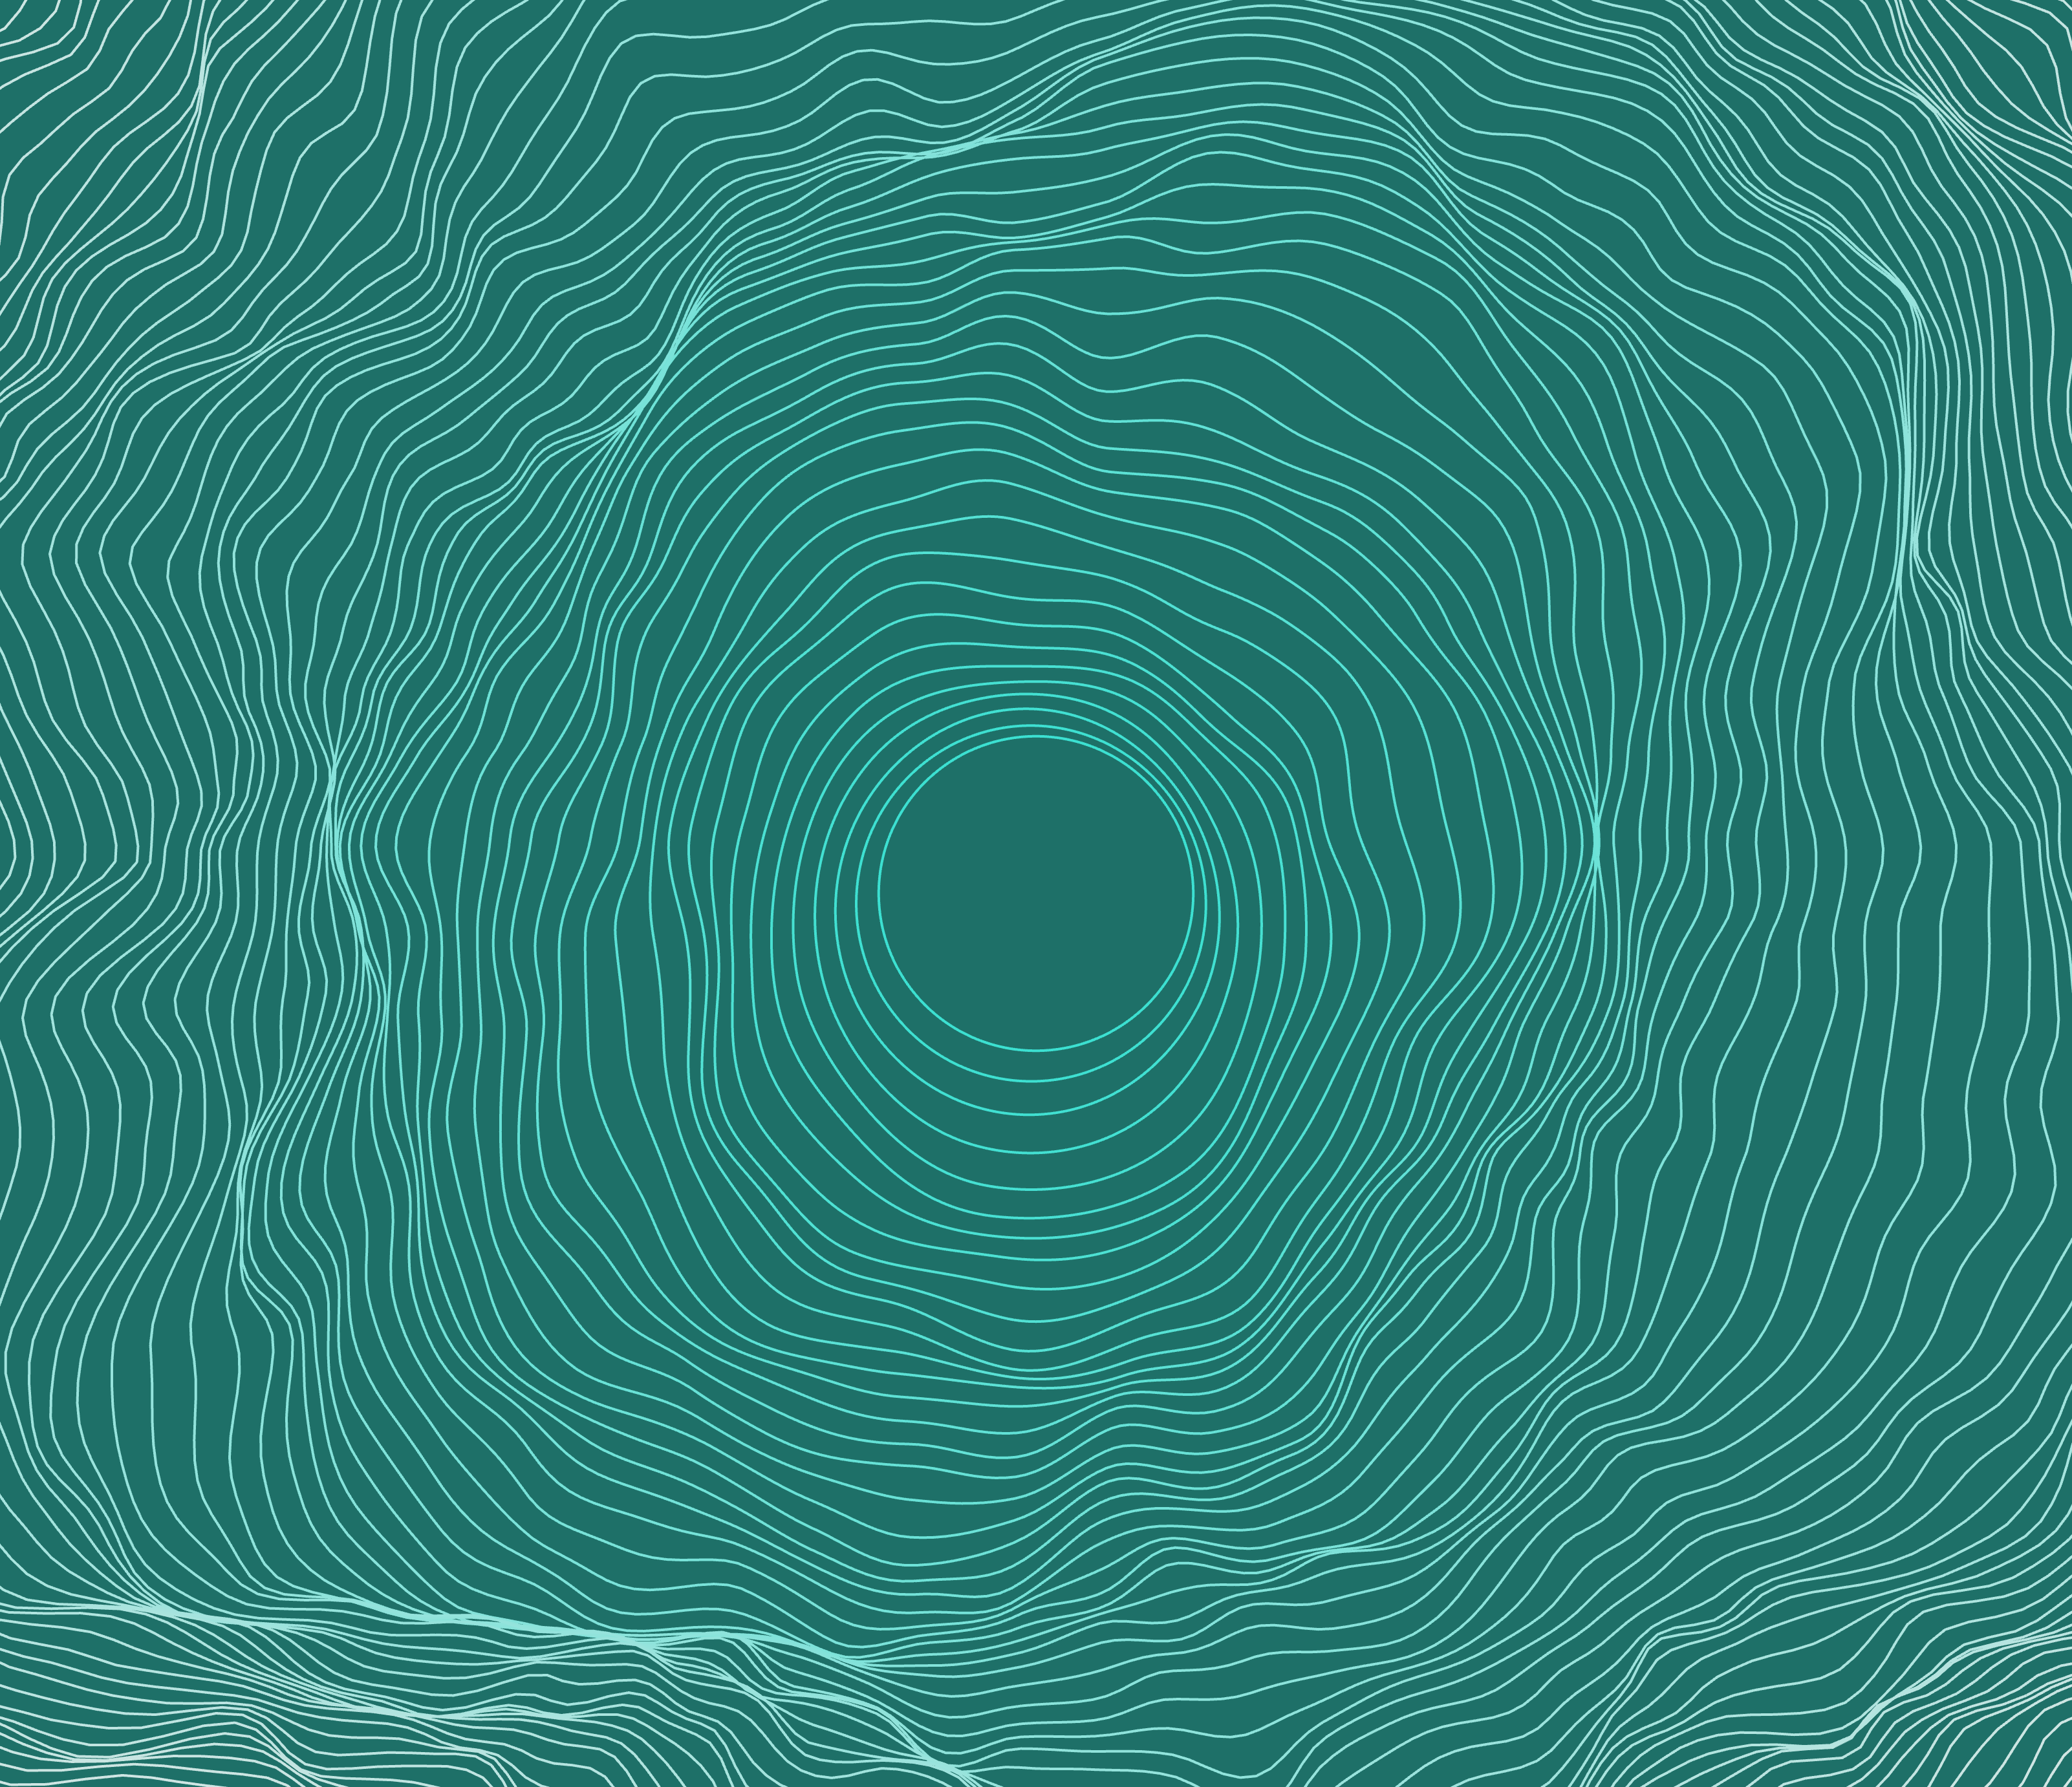
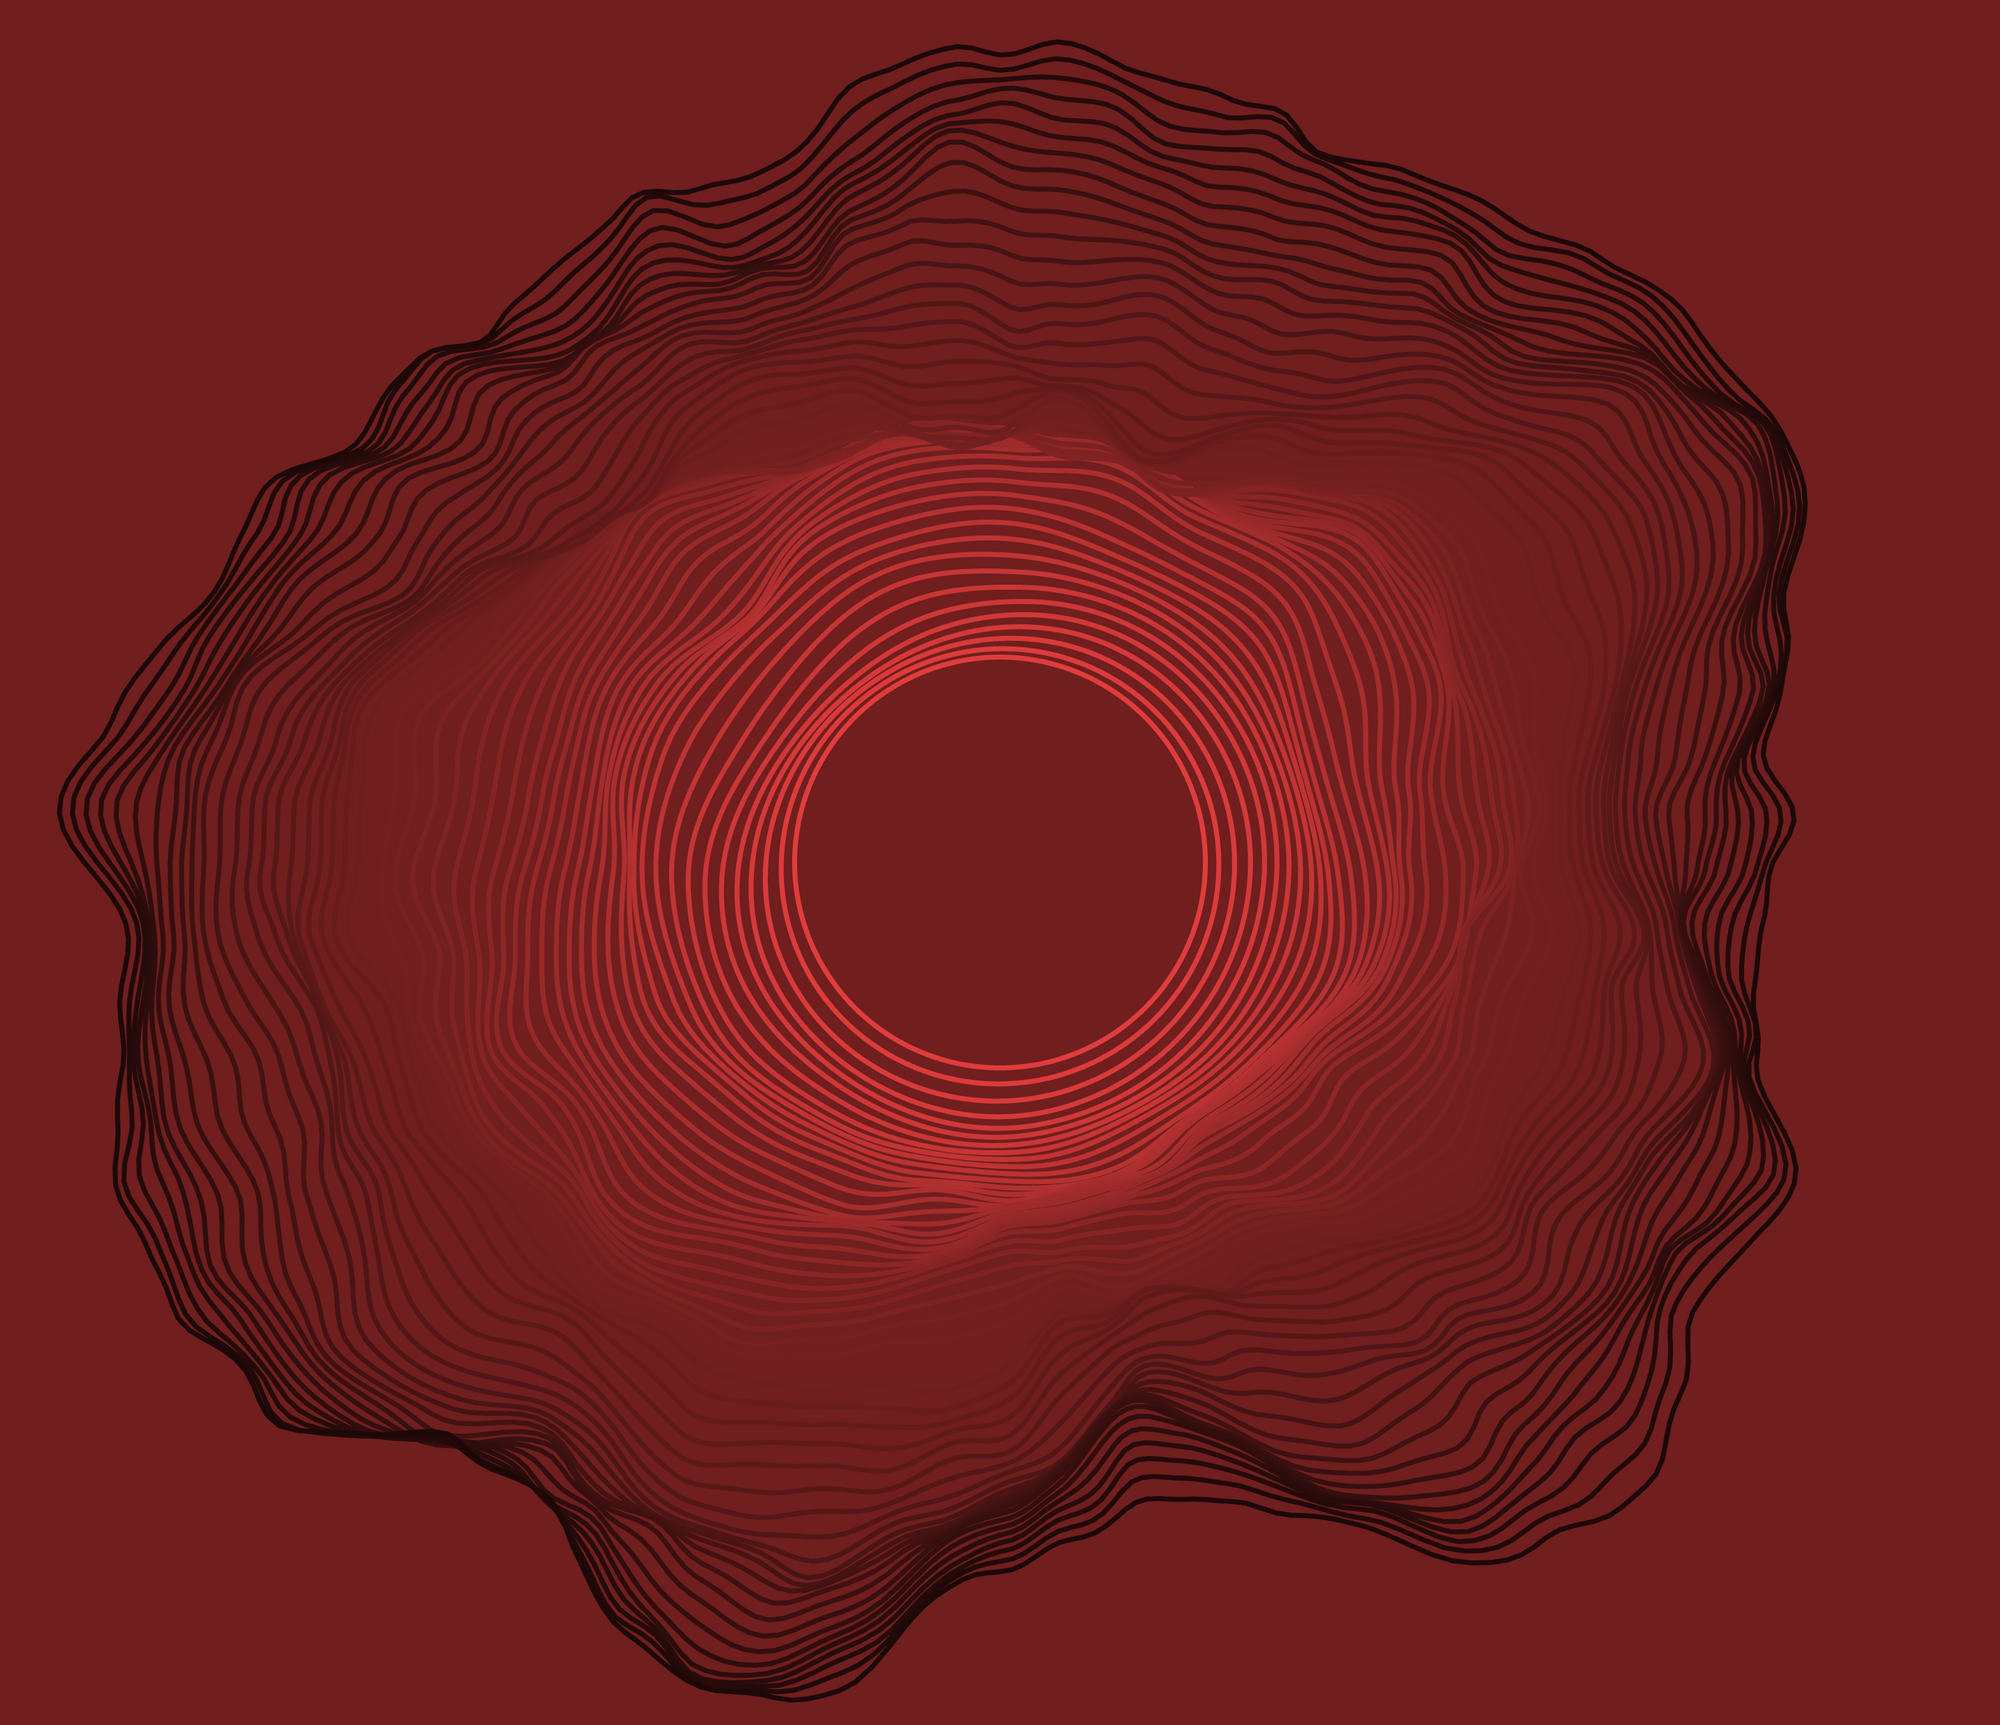
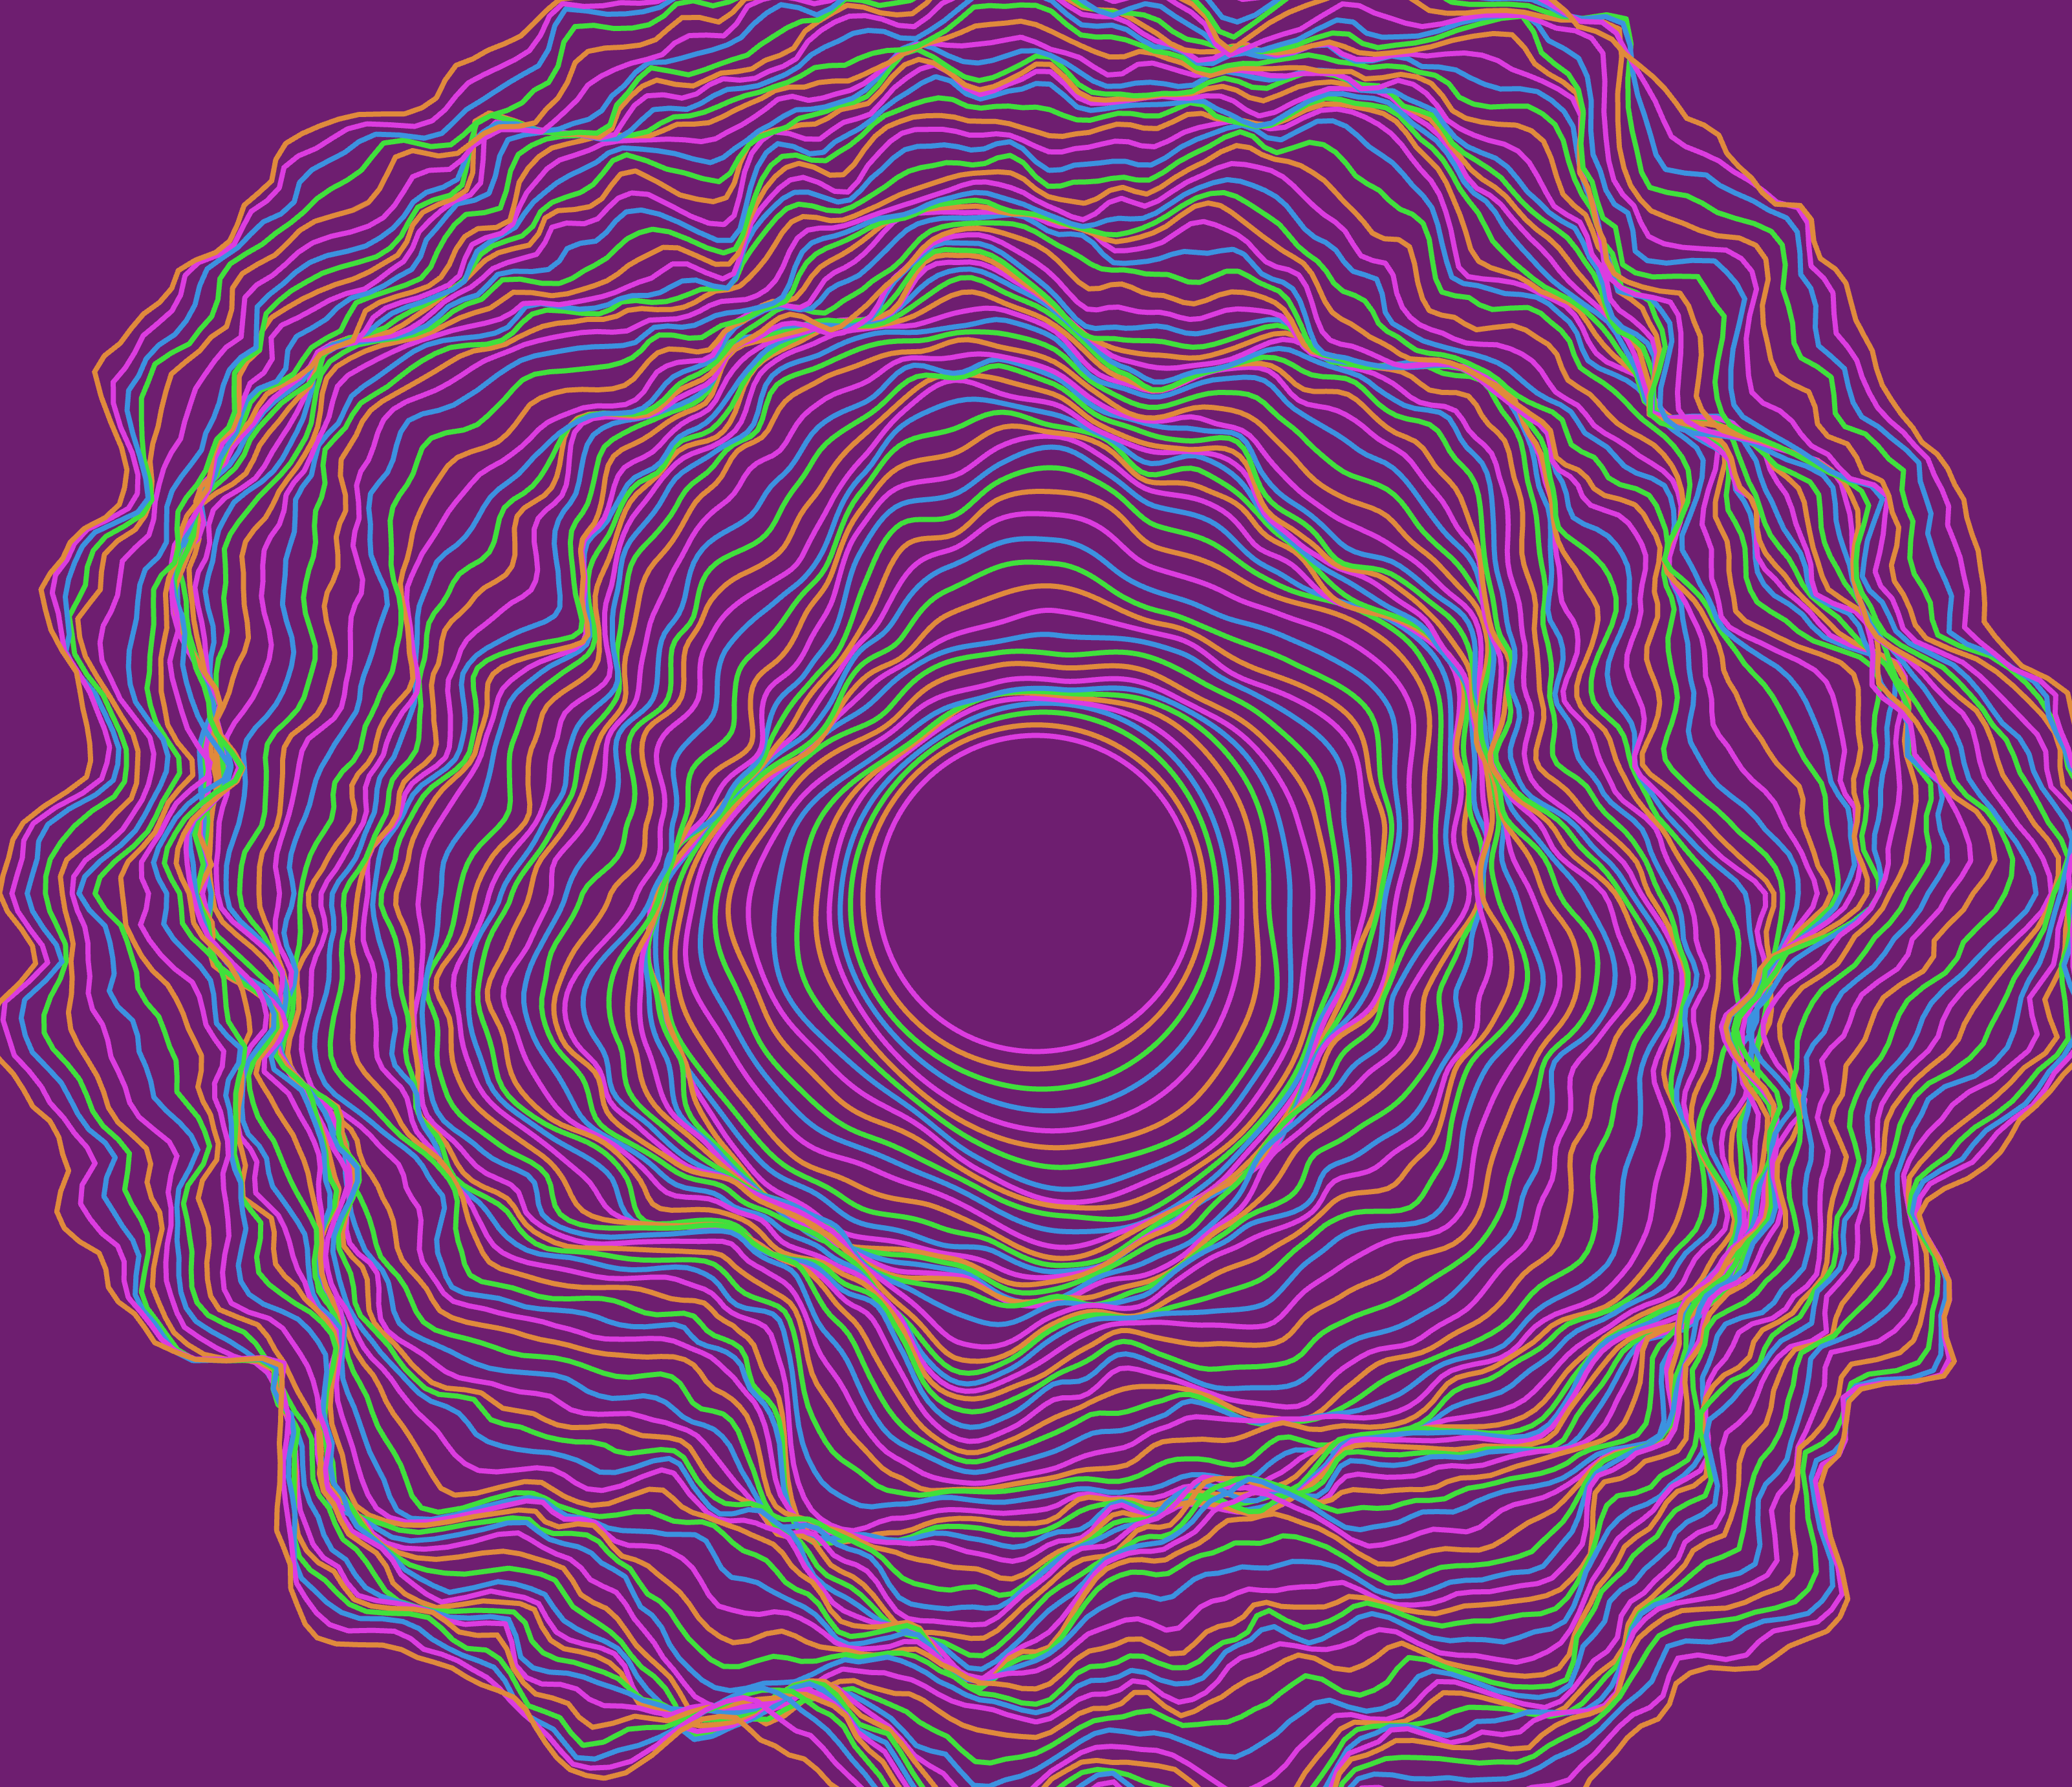
Different results by playing around with the sliders
🥳 That's all, congrats for following along and learning more about creative coding, generative art, Perlin noise and p5.js.
Like always, you can find the full code here:
To stay informed about future articles, feel free to subscribe. It’s free, and your support means a lot. Thank you!
Wrapping Up
Thank you for following along with this tutorial! If you have any questions, feedback, or just want to share your own creations, please feel free to leave a comment below. I’ll make sure to respond and help you out as best as I can.
Stay connected for more exciting tutorials and creative coding tips by subscribing to this blog. I really appreciate it!
Happy coding, and see you in the next tutorial!
Next tutorial
In the next tutorial, we will explore the world of shaders and how we can use them to create metaballs, using a concept called SDFs. I hope to see you there!